


The headdress is made of three layers of fabric - an interlining of duck canvas sandwiched between two outer layers of fashion fabric. The canvas is reinforced with jewelry wire to give it shape and support, and to allow the pieces to be shaped to the wearer's head.
I started out by adding jewelry wire (I didn't have any millinery wire, and jewelry wire works just as well) to the edges of the canvas pieces.

I used 3" jewelry head pins, which was the longest ones that were at the craft store. I would really have liked to have used longer ones so they would cover the entire length of the back crescent, but that was all that was available, so I had to make due. For the front crescents, I added a gold bead, a large pearl, and another gold bead to the top of the pin, and then I sewed it down to the canvas. This way, the pins served as ribs for the crescents, adding support and shape.

The back crescent was done in a similar fashion, but since the pins didn't reach across the entire length of the canvas, I added some extra jewelry wire in a zig-zag to give a bit of extra support.


After I had finished the guts, I started working on the decoration. I quickly stitched the top layer of fashion fabric to the canvas at the edges, not worrying too much about neatness, since the stitching would be covered by the lace. I then stitched down the lace, and added the beading, which is the same beading I used on the dress, to tie the two pieces together.

On the headband part, I did a latticework of the dress beading. Unfortunately, you couldn't see much of the headband once all the crescents were sewn on, but I know it's there, and it does add a little extra sparkle that can be seen from the side.


I went ahead and stitched the back crescent to the headband at this point, before working on the decoration on the front crescents.
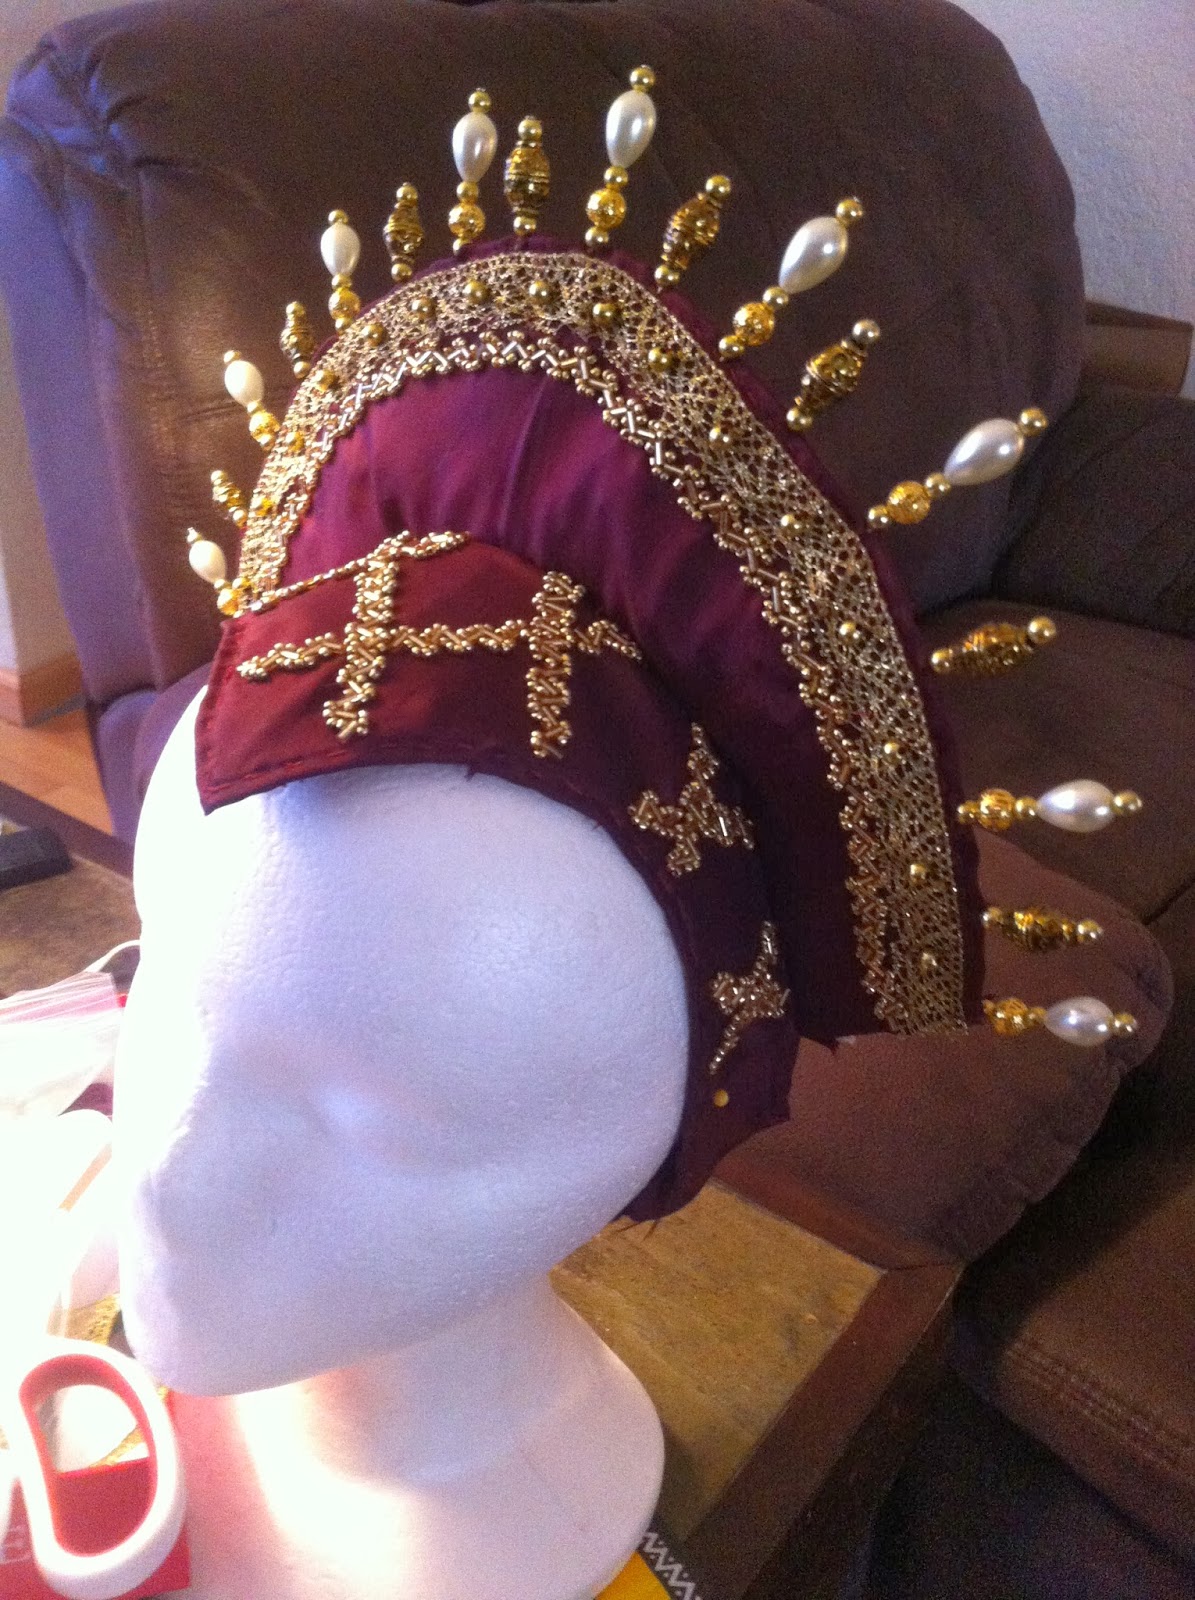
The front crescents have similar decoration to the back one, except that there's an extra row of beading at the bottom edge.

For the front crescents, I went ahead and stitched the back fashion fabric onto them before adding them to the headband. I had planned to have the seam allowance on the bottom of the headband, which would then be covered by the headband's lining, so it made sense to finish them at this point. Unfortunately, I didn't take any pictures of the back.

Once the front pieces were sewn on, I added the back lining to the large crescent, before adding the headband lining, which covered up the seam allowances from the three crescents. Once everything was put together, it was all very clean and neat, and I was very pleased with the outcome!
I'm going to work on digitizing the pattern I made for this headdress, to make it available for download to whoever wants to try making their own. I'm going to try and create a few different downloadable patterns this year, so look for a "patterns" tab on the main toolbar once I have them available!


wow, just wow! This is superb! It looks more than epic! Now i want to make one too! It's so pretty i just keep staring at the pics. Excellent work! I bow before your skills m(_ _)m
ReplyDeleteI would love to purchase something like this
ReplyDeleteHi, Lissa! Send me an email about what you had in mind and we'll talk. :)
Deletem_martin85@yahoo.com
This is absolutely beautiful. Thank you so much for sharing!
ReplyDeleteThis is gorgeous! I’d love the pattern
ReplyDeleteOnce you stitched the jewelry head pins down to the fabric, what do you do to stop them from slipping through the stitches and coming out? do you tack it down with a glue?
ReplyDeleteI haven't had much trouble with them sliding out, but if they are giving you problems you can definitely put a drop of glue at the tip of the pin so it won't move.
DeleteOne word: Wow! Do you have insta, so I can follow you?
ReplyDeleteHi! I'm on Insta as @clusterfrock
Delete